Plumber Wattle Grove

Wattle Grove Emergency
Plumbers

CALL US ON 0410 333 993

Prolific plumbing wattle grove is a plumbing service rendering company that specializes in rendering services for all types of building, be it commercial or residential building in Wattle Grove and all other regions around Sydney.

Prolific plumbing services Wattle Grove are equipped with amazing plumbers, who are professional in all the services they render to the good residents of Wattle Grove.

Prolific plumbers are experienced and professionals in their dealings, delivering services at industrial standard. Prolific plumbing has well equipped and stocked trucks with the latest technologies.

Prolific plumbing has very friendly staff that treat all customers in a friendly and respectable manner. Because in Prolific plumbing, the customer comes first, your needs are our concern.

Prolific plumbing service has spent a lot of time in building their reputation as the number one go-to for plumbing services in wattle grove as our philosophy is centered upon providing first-class plumbing service to each and every of our clients.

All plumbing services in Wattle Grove are licensed and insured. We invest heavily in all our staff and give them the best of training.

Prolific plumbers have licenses and accreditation to provide the services in the most professional way possible. They are continually updated with the latest plumbing technologies to offer better services.

We have a proven track record with all our current customers for different parts of Australia. Most of the time, we don’t need to talk so much about our plumbing service because our work does the talking for us.

We have a long history of plumbing services, and through that time, we have been able to build the best plumbing servicing company in Sydney.

Prolific plumbing services are very transparent. We don’t have any extra charges for our services. We let our customers know every step of the way what is happening, and we are very upfront with our pricing and services. From the start to the end, we communicate all the process.

Our plumbing service fees are very competitive, are designed to be very affordable, and have very high value for each dollar you spend.

Prolific plumbing Wattle Grove offers a lot of services, which includes services like:

1.    Blocked dam repairs

2.    Toilet repairs

3.    bathroom renovation

4.    Repairing overflowing drains

5.    Hot water system installation

6.    Burst pipe repairing

7.    Toilet installation

8.    Leaks into taps

9.    Emergency plumbing work

10.  Sewage services

11.  Gas fitting services

12.  Leaking pipe detection

13.  Leaking pipe fixing

14.  Blocked stormwater repairs

15.  Kitchen sinks

16.  Gutter leaks repairs

17.  Bathroom plumbing

18.  Unblocking of any drain

19.  Gas heater installation

20.  Gas heater detection

21.  Pipe relining

22.  Water filter

23.  Backflow prevention

24.  Roof leaks

25.  Drain inspection using CCTV

26.  Gas heater repairs

27.  Leaking shower repairs and a lot of other plumbing services.

Prolific plumbing has an awesome response rate and customer satisfaction rate. Try us today. To our Wattle Grove residents, stay safe even in these trying times. If you have any questions or need more information regarding our services, call us or email us. Let’s help you fix them.


Contact

[contact-form-7 id=”16″]

Why Choose Us

  • SAVE MONEY ON YOUR PLUMBING:
  • SATISFACTION GUARANTEED RED CARPET
    SERVICE:
  • ON-TIME OR WE PAY YOU UP TO $100!
  • PROFESSIONAL PLUMBERS:

Shower Screen Installation in Sydney

shower screen installation

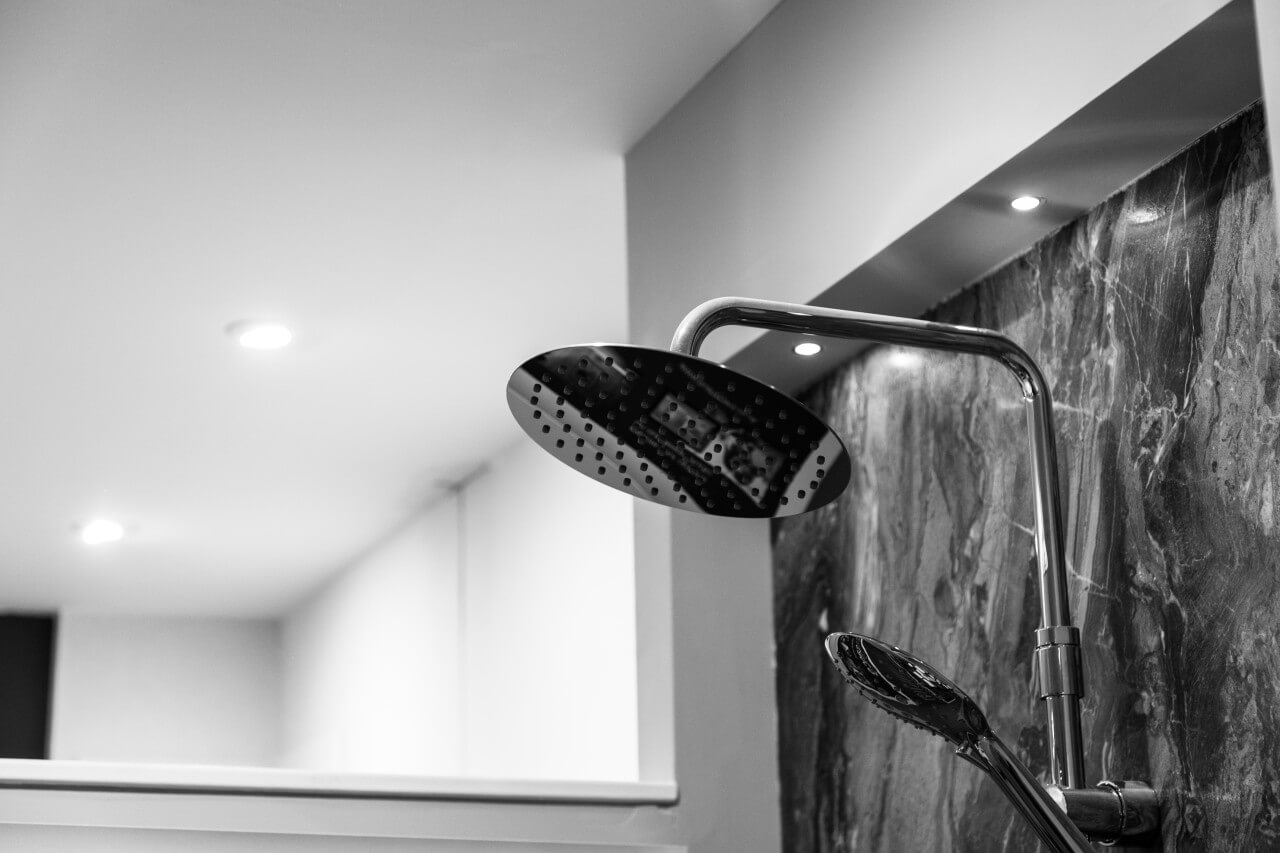
Shower screens are ideal for small bathrooms. They are making the space into a bigger look and will be evoking a sense of a luxury hotel environment. Prolific Plumbing is a Shower Screen Installation professional servicing Hurstville and other areas of Sydney. Nothing makes it happier to keep your home decorated and well maintained and if you are a new one to begin this process, try it from your wet area or the shower.

Prolific Plumbing has various screen ranges to make it a better place for an hour shower place and to gain excellent results. Replace the shower panels with some ranges of shower panels and start a project to yield excellent results.

When thinking about installing a new shower screen, it is more like a fun project that everyone can enjoy. Installing a Shower Screen is an essential part of any bathroom renovation. So there are various ways of installing these shower screens, and Prolific Plumbing has the following shower screen installation options to choose from.

Shower screen installation process

Step 1: Set out the brackets

The first thing to do here is the setting out the brackets. Make those centre lines of the panels on the floor, and by using a spirit level, we need to mark the vertical centerlines, which are upon the walls to length over 2000mm high. Mark these screw holes onto the brackets with the panel centerlines, which join the floor and the walls. It has to be at a recommended spacing.

Step 2: Attach brackets

The second one is the attaching brackets. It has to use a ceramic drill of 6mm for drilling the marked holes to have a depth of 30mm. It has to be done by applying pressure onto it at a low speed; then, it has to insert with those supplied plastic plugs. These plastic plugs have to be set on to each hole and trim that excess of them using a utility knife. Next, these brackets have to be attached using screws and then loosen those grub screws.

Step 3: Install a fixed panel

Step three is to install a fixed panel. Cut those rubber blocks into 6mm and positioned them into each bracket with support from the glass. Lift these panels into the wall brackets of the floor and tighten them up with the grub screws by using an Allen key. The process must be done by using the gloves of glass lifting.

Step 4: Secure the hinge panel

Securing the hinge panel. By repeating with that hinge panel, we have to check whether the door is opening 6mm wider than it is onto the door panel. And the gap between the wall and the panel should not be more than 12mm. Then after the screws have to tighten, there should be a rubber block placed on the above brackets to create an even gap.

Step 5: Seal gaps

Sealing those gaps will be the next step. There should be an applying silicone to the gaps between those panels and the walls. It has to be done by using a spatula of silicone to push to the gaps and scraping away from the excess. These are smoothing the surface with some rounded corners as well. There should be sealing the gaps between the floors and those panels right after installing the door.

Step 6: Attach the door panel

Attaching the door panel is the last step. The hinges have to be secured onto the recesses on the hinge panel. The rubber blocks, which have been already positioned to the opening son door’s blocks, are lifting the floor to the blocks and attaching the hinges. We need to check whether these gaps have an even distance and tighten those screws and the block removing. The excess rubber has to be cut away from the other types of panels.

Why do you need a professional shower screen installer?

There are potent DIY shows and stores for those who are feeling excited to try new things and fix up the items on their home by themselves. However, this is not the best practice to have a better ending. Sometimes, you need help from professionals to make things right. So that is the reason for selecting an expert team as Prolific Plumbing.

Our team has the best budget option on shower screens, and we see many clients are facing troubles on having a sad outcome. This happens due to poor installation of shower screens performed by someone who doesn’t have the experience and knowledge to fix it correctly.

It is always a considerable point to choose an excellent contractor for installing your screen. Even some others have the experience, they can be still the wrong choice, and if someone has a long reputation with the trust of clients, that will be the best for you. This job is not as easy as installing a shower rail or a toilet roll holder, so you need to find an installer who has the qualified, insured and certified features.

The best progressive way to avoid common mistakes will be to take the assistance of our team for your sower screen. Why do you need to call us at Prolific Plumbing? These are the reasons.

Decisions on budget and the design

Proper shower screen installation always begins with the decision. So it is very crucial on choosing the correct shower screen for you. Take into consideration of your budget and the design. Our team is there for you to help in discussing several options you have and will help you have the best choice before you begin the installation. There is a wide range of shower screens that differ in price dramatically.

The layout of the bathroom

It is so important on considering the layout of your bathroom when you are selecting a shower screen. The worst thing in a shower screen is the opening outs, and they are hitting the bathroom door or a newly installed bathroom vanity. So when choosing the glass door of sliding, you have to ensure that it is sliding in the correct direction for effective usage.

Taking the right measurement before installing a shower screen is the main task to perform. If you got the incorrect measurements, you will surely end up with a screen that will not fit correctly, which would be an expensive mistake for you.

Shower seals

Seals of the shower screen are the second most important option here, and they are keeping the water of the shower to be recessed with the sealing of glass joins. Although DIY people can do this, they have a high possibility of getting these attachments into wrong, and they will not either install them correctly or cut them out with some incorrect sizes.

This means that shower screen installation will not be performed properly and that it will risk to be unstable. They are causing the leakages, and more water will be on the floor, and more moisture comes to the bathroom. So those are leading into more moulds around the joins of the bathroom.

So give us a call at any time if you want to have a budget-friendly shower screen installation. We will manage to do it properly and will ensure your valuable time and money. Prolific Plumbing is expert in shower screen installation in Hurstville and other Sydney suburbs.

One call solves it all!

How to install toilet roll holder

how to install toilet roll holder

Prolific Plumbing is a Toilet Roll holder installation professional servicing Hurstville and other areas of Sydney. Learning how to install toilet roll holder into your bathroom would come in handy when you move into a new home and want to fix a new toilet roll holder into our new toilet or when we want to renovate our homes or when the toilet roll holder, we use go bad.

In any case, this article will come in handy as it is written to explain the step-by-step process to fix and install your toilet roll holders for your toilets. The whole process is easier than installing a shower screen, but you still need to know what you are doing.

Some of the tools Prolific Plumbing uses to install toilet roll holder include the following:

To start to mount your toilet tissue roll holder, you will need the tools listed below. A stud finder is optional, but it will make the job a lot easier and faster.

  • Power drill with drill bits
  • Bubble level
  • Screwdriver
  • Masking tape
  • Stud finder (optional)
  • Hammer (when using drywall anchors)

Step by step process to install toilet roll holder

Step 1: Choosing the location for the installation

There is no rule as to where to and where to not fix your toilet roll holder, but the generally accepted standard is to mount the toilet roll holder on the wall 26 inches above the floor, and 8 to 12 inches in front of the toilet. The idea is the that toilet paper holder needs to placed within easy arm’s reach from your toilet and should be high enough to prevent the toilet paper from dragging on the floor

With that said there is a lot of possible position to pick from, but when there isn’t a suitable location to the left or right of the toilet you can consider a couple of other options.

Other options you can consider include:

  1. Freestanding holder– If you can’t decide on a mounting location, you could purchase a non-mounting holder instead. Freestanding holders can be easily moved to another location, this way you won’t have to drill holes. But people go for these options and would prefer the mount option but either way they both work fine.
  2. Install toilet roll holder in front of the toilet – Another option is to mount the holder on a wall in front of the toilet, and you can also measure the position 26 inches high from the ground. This option is only feasible if the holder would still be within reaching distance from the user in the toilet.

If you install toilet roll holder on drywall you should try to centre the holder over a stud, if you can’t find the stud you need, then you will need to insert some wall anchors in the drywall before screwing your toilet paper in place.

Step 2: Check if all the parts you need are available

Now you need to select and buy the actual part. Temple and Webster got some great toilet roll holders or check out your local Harvey Norman. The next step is to make sure you check if all the tools and parts you need are available. Before you start any project, you should make sure you have all of the parts you need to complete it. Open up the box for the holder you’ll be installing and make sure you have everything you need.

You can also dry-fit the pieces to see how they will go together before you start to drill. Most kits include a paper mounting template to assist with drilling the holes. Locate the template

Step 3: Measure the holder’s location using the template

Every toilet paper holder has a template that will help you decide where to attach the two brackets on the wall. One way you do this is to place the template against the wall and use the carpenter level to confirm if the template is leveled. You should use a pencil to mark the places where the brackets will be attached to the wall.

This process will allow you to easily know the precise place to drill holes in your wall so you can attach the holder to the wall. Sometimes the template will not be a separate piece of paper, it would be printed to the back of the box instead.

Step 4: Make Sure the Template Is Level

Place your carpenter level along the top edge of the template and make sure it is completely level. If the template isn’t level, then the holder will not be level once it’s mounted. If you need to make any adjustments loosen the tape and re-level the template. This step is very important so you might want to double-check your work.

Step 5: Locate Any Studs in the Wall

Next, use a stud finder to determine if you will be drilling into any studs. Slowly move the stud finder along the wall and mark any studs you encounter.

If you discover that any of the holes will be drilled into a stud, it’s not necessarily a problem, but you will not need drywall anchors for those holes. Some people prefer to have at least one set of mounting holes go into a stud for added stability.

If you don’t have a stud finder, you can gently tap on the wall to look for the studs

Step 6: Mark the screw location on the wall with a marker or pencil, place your template and drill your holes

This will help make your work neater and better when you gradually drill the holes, as you have already marked the right spots to drill. Make sure the template is level before you start to drill.

After making sure the template is located in the proper location you can begin drilling the pilot holes.

  1. Use the drill bit size listed in the instructions.
  2. Making sure the drill is level carefully drill holes in the locations marked on the template
  3. Remove the template after all holes have been drilled, most mounting systems require four holes.

Note: Try to make the holes smaller than the screws especially when you are not using wall anchors. Make sure the hole is slightly smaller and not as deep as the length of the screw. Try to drill precisely and neatly.

If you have wall anchors you should drill the holes a bit bigger and slow deeper at least as deep as the wall anchor, then use the hammer to put the wall anchor in place. It is ideal to add a wall anchor if you don’t have studs on the wall this will prevent the toilet paper wall screw from ripping out of the drywall.

If there is an instruction on the bit size in your toiler toll holder manual then you should drill the holes using the bit size specified in the instructions.

Step 7: Install the Mounting Brackets

  1. Using a hammer, tap the drywall anchors into the screw holes. If the holes go into a stud, you will not need the anchors.
  2. Secure the mounting brackets to the wall using the screws in the kit.
  3. Place the holder on the mounting brackets
  4. Secure the holder to the brackets by tightening the lock screws using a screwdriver. The lock screws should be on the bottom so they cannot be seen. These lock screws should firmly hold the bracket against the wall. Before screwing the brackets in you should inspect if the screws are regular or Phillip heads so you know the kind of screwdriver you need.
  5. Hang the roller holders on the attached brackets. On the base of the roller holder there is a mark showing which side goes up and which stays down. Press the roller holder into place, one on each bracket you should not do that if your toilet holder did not come with two set screws you can skip the next step.
  6. Make sure the holder sits flush against the wall. Then screw 1 set screw in the bottom of each roller holder. The set screw will clamp the roller holder against the bottom of the bracket and keep the roller holder from popping off the bracket
  7. Add toilet paper and the spring loader paper holder. To do this take a roll of toilet paper and slide the central cardboard tube over the paper holder.  You should squeeze both sides of the paper holder inward into the paper handler between the two roller holders. Release the spring-loaded sides and make sure the toilet paper rolls easily.

This is the leas step; you should know that this paper holder instalment can be done as quick as 20 minutes.

Extra tips you should know:

Drilling holes in drywall would create a lot of dust, so I recommend cleaning it up with a vacuum as soon as possible.

Gently pull on the holder to make sure that it is attached securely to the wall. If the holder moves when you touch it go back and make sure all of the screws are fully tightened.

You should know that to install toilet roll holder you can call Prolific Plumbing (we are a Sydney plumber that does not consider such jobs too small to attend) to help you in case you don’t have the time to learn the DIY method and want to install toilet roll holder faster and proper.

You should also be very careful when trying to screw the bracket into place.

If you are in Australia and you need a fix on your blocked drain. You should call prolific plumbing services to help you fix them. They are one of the most reliable and efficient plumbing repair service company in Australia today.

One call solves it all!

How to install shower rail

how to install shower rail

How to install shower rail. Prolific Plumbing in Oatley, Sydney is happy to install a shower rail and will tell you how to do it. Before you start to install a shower rail, it’s important to understand the type of shower rail that will satisfy your needs. We need to explain what shower rail are, the benefits of installing a shower rail, and a step-by-step guide on how to install a shower rail.

What is a shower rail?

Shower rail kits are one of the most well-known forms of shower outlet in the bathroom. They are made up of a showerhead, a shower hose, and a rail on which the shower heads slide up and down which brings us to the part where we define what a shower rail is.

Slide rail showers are a bit more meticulous but more docile than a fixed shower head, so perfect for people that don’t want to wash their hair every time they take a shower. A shower rail kit allows you to quickly adjust the height of the showerhead for optimum comfort so that tall people won’t have to always bend over and shorter individuals can bring the shower head closer to them.

The slider rail usually travels vertically up the wall and has two stoppers positioned at each edge. The showerhead that is attached to the taps through a hose then slides up and down this rail depending on the length you pick.

Shower riser rails are obtainable in different types and styles of designs, including the curved adjustable shower curtain rods, adjustable straight shower curtain rods, fixed single curved shower curtain rods, tension double curved shower curtain rod, and fixed single straight shower curtain rod. We are going deeper into the types of shower rails.

Types of shower rails

There are some qualities we need to consider when we are buying and installing shower rails and curtains. These qualities you need to consider when buying a shower rail: its shapes and materials used. A shower rail may be straight or curved.

There are other shapes you can find in a store, they can be square, L-shaped, or round, the shape of your shower rail affects the space provided. If you want a simple solution ASAP – just buy one from Bunnings and let Prolific Plumbing install it. Curved shower rails provide more space when compared to straight ones. This feature makes sure water stays in the bathroom instead of spilling on the bathroom floor.

The design of curved shower rails makes a bathroom look more luxurious and exclusive. You don’t need to buy a special shower curtain for a curved shower rod. Just like the regular straight rods, you will need an additional long shower curtain if you install the curved shower rod high on the shower walls and close to the ceiling.

With so many shower rails to pick from, picking a suitable shower rail may be very tough therefore in this part of the article we will list and explain each type of shower rail.

  1. Curved Adjustable Shower Rail: The curved adjustable shower rail bends away from the shower and its length is adjustable, usually between 5′ and 6′. This type of shower provides more space in the shower and it’s adjustable, so you don’t need to trim the rail to fit your shower size. Well, this shower rail has some disadvantages. It reduces the available space in the bathroom and because it’s drilled into the wall, it can damage the wall.
  2. Adjustable straight shower curtain rails: Adjustable straight curtain rods are one of the most popular models of shower curtain rod. They typically fasten to the wall with a tension spring inside the rail. It is easy to install. With the tension spring in place, this shower rail eliminates the second disadvantage of the curved adjustable shower rail which means you don’t need to drill any hole into the wall. Just like every other type of shower rail, the adjustable straight shower rail has its disadvantages. Just like every other straight shower rail, it provides small space, therefore, causing water to spill on the floor and it can’t support a heavy curtain.
  3. Fixed Single Curve Shower Rail: If you have a conventional length shower, a fixed single curve shower rail might be excellent. Fixed shower curtain rods are typically around 5′ to 6′ long which is the length of standard bathtubs and shower. A fixed single curve shower rail is usually drilled into the wall but it’s more secure than an adjustable one. It is difficult to a particular length of this type of shower rail.
  4. Tension Double Curved Shower Curtain Rails: A tension double curved shower curtain rod connects to the walls with a tension spring inside the rod instead of drills, but the length is fixed. This type of shower rail is different because they render two different rods for the shower curtain and the curtain liner. A tension double curved shower drill is ideal for bathroom walls you don’t want to drill holes into. Using double shower curtain rods reduces the chance of mould or other types of fungi growing between the shower curtain and liner. It has its disadvantage too; regular tension double curved shower rail isn’t usually secure mostly on a ceramic wall.
  5. Fixed Single Straight Shower Curtain Rail: This is the most popular to install shower curtain rod style; fixed single straight shower curtain rail provide a modest and secure place to hang your shower curtain. They are usually attached to metal hardware that screws into the wall for a long-lasting finish. There little to no risk of the curtain falling and it is easy to find a fixed single straight shower rail in the correct length for most shower length.

A step-by-step guide on how to install shower rail

Shower rails and shower screens are one of the most crucial parts of a bathroom design. When you install shower rail, you will have to decide which design will fit into your bathroom decoration and which type of shower rail would be the best for you, then take decisive steps in installing it properly. When choosing the right shower rail, we need to consider vital features: tension rods, fixed and custom rods.

Tension: Tension rails are ideal for temporary shower rail fix as there is no drilling involved instead tension rods are chocked in place between the two walls. They aren’t secured and are likely to fall off if tugged on. Tension rods can also damage drywall if it’s chocked too tightly without any post support. To avoid this, it is most helpful to find the post to help support the rod.

Fixed Rods: This is the kind of rod used for traditional showers. They come in different designs and styles and are relatively easy to fix when compared to a tension rod. They may be attached to the wall using drills, making them more secure when compared to a tension rod. They may be straight or curved.

Custom: Custom rails are known for their unique shapes. They may be round, square, D-shaped, L-shaped, or oval rail that is attached to the ceiling or attached to the walls for corner showers.

Tools needed for shower rail installation

  • Pencil
  • Screwdriver
  • Drywall anchor
  • Drill
  • Tension rails or fixed rails or hardware
  • Stud finder
  • Tape measure
  • Shower curtain

Measuring Shower Rail Installation Height

  • Measure the Height of The Shower Curtains: If the curtain is new the height would be listed on the packaging. Otherwise, you will need to measure it using a tape measure. The standard shower curtain is 74 inches by 74 inches.
  • Measure the space between the curtain and the floor of the shower to ensure that it hangs properly: There should be a 2inch distance between the floor of the shower and the end of the curtain. The two inches of space between the curtain and the floor prevents the bottom of the curtain from accumulating moisture and dirt
  • Add 4 inches onto the curtain’s length: You may need to adjust your curtain up or down slightly to meet your taste, but generally, adding 4 inches onto the curtain’s length should provide a fitting placement.

Installing a Tension rod

  • Adjust the length of the rod by twisting it: Increase the length of the tension rod until it’s 1-2 inches longer than the distance between the two walls. Twisting the tension rod clockwise will shorten the curtain rod.
  • Make sure the rod is perfectly straight
  • Fix the shower curtain onto the tension rod before installing
  • Wedge the tension rod into place

Fixed Shower curtain rod

  • Use a stud finder to locate a stud behind the drywall. The device will beep when it detects the presence of a stud. If you can’t find any stud, you can add support. If there is no stud or if the wall is tiled, drill a hole to the wall then add an anchor as well
  • Make sure you screw your drywall anchor then install hardware including screws into the wall anchors

Hang the shower rail and liner

  • Slide your shower curtain rings onto the curtain rail: The standard number of shower curtain rings needed is 12 and they are sold in that quantity. If you have a ring that has some sort of decoration, make sure the decorated part is facing outside the shower. Make sure your rings fit perfectly.
  • Then install shower rail into the holes and hang your curtain.

One call solves it all!

Gas plumbing

What is gas plumbing? Gas fitting for all

Are you planning a full house renovation or just a quick kitchen makeover? Or maybe you are moving into a new apartment and need some a gas plumbing service in Sydney? Then you are reading the right article.

Gas fitting is not a service a lot of plumbing services companies can offer but it’s different for us. Prolific plumbing is a plumbing company based in Oatley, NSW that offers best gas fitting services.

Prolific plumbing offers its services to the residents of the Gold coast and regions around.

If you reside in Sydney, we are happy to offer a right gas plumbing services to help you with gas fitting. Prolific plumbing offers some of the best gas fitting services.

In terms of cost, a gas cooking appliances are more cost-effective than electric ones.

Got gas leaks to fix? Prolific plumbing is there for you. Gas leaks are very dangerous as they can lead to fatal accidents. They are considered as emergency plumbing task, something you call a plumber in to fix immediately you notice it.

Thanks to our 24/7 services, you can call us at any time to provide this service for you. We have gas experts who would assist you in solving this problem.

We offer gas fitting services and also:

  • Gas pipe installation
  • Gas detection system installation
  • Connection of gas pressure regulation
  • Gas pressure adjustments
  • Gas meter installation with pipework and valves
  • Gas bottle installation, gas lines, regulator valves changeover
  • Repair, maintenance Conversion, and Installation of gas appliances
  • Measurement, and placement of gas equipment, etc.

You don’t have to wait long time to fix your gas fittings, Prolific plumbing are professional plumbers that are there 24/7.

If you are in Australia and you need a fix on your blocked drain. You should call prolific plumbing services to help you fix them. They are one of the most reliable and efficient plumbing repair service company in Australia today.

One call solves it all!

Strata plumbing in Sydney

blocked drains rescue

How to solve strata plumbing. Sydney guide

Strata plumbing comes into play when your property is part of a strata scheme. The strata title is given to properties that share common things with other properties like when both properties with different owners share a parcel of land.

Each property, in this case, is called a lot, when homeowners share a common property the plumbing of the property will run through the bout units and this becomes common property. This common property is managed by the owner’s cooperation.

The owner’s cooperation consists of all the owners of lots on the same land which was subdivided into specific units, townhouses, or apartments.
There are sometimes issues when plumbing issues occur on the properties, for instance, let’s say there is a leaking pipe causing damage to the common property some units on the land.

Usually, it’s the job of the insurance company and the owner’s corporation and the private owner suspected to be the cause of the leak would take the strata titles to determine who owned the portion of the pipe that got compromised.
Doing this analysis or assessment can be complex as it would require the engagement of specialized consultants, loss adjusters, and legal counsels.

So what exactly is strata plumbing?

Strata plumbing is the term used in referring to the plumbing work like pipes fitting and fixtures that enable water to flow in and out of a property that is bound by strata title.

Strata titles, as we have explained in the introduction, refers to apartments, units, or houses that are interconnected, that means they share the same pipework into the different lots.

Most ties lots townhouse or apartment in a strata setting have the same plumbing lines except if it was factored into consideration during the construction to create different lines for the different lots on the building.

The reason most buildings don’t use a separate plumbing line is because it is very expensive to install and would result in the interconnection of too many pipes and fittings into the buildings.

Some of the common plumbing issues that arise for strata plumbing are:

  1. Leaking shower in private property: for this the liability is on the owner of the private property if the cause of the leak is discovered to come from an internal fitting. But if the problems were found on a plumbing appliance that was caused by common property infrastructure then the liability falls on the owners cooperation.
  2. Leak from one property to another: this depends on how the leaks get to each apartment. If it is caused by the private lot internal fixtures then the responsibility is on him but if it is caused by plumbing installed between the walls serving both properties then it’s the owners corporation responsibility.
  3. Burst pipe under private property floor: A burst pipe is normally the responsibility of the owner’s cooperation but if it’s caused by the toilet of a private unit then it becomes their responsibility.

There are endless scenarios that can be pointed out like leaks from the balcony and so on. There are many plumbing issues that arise from a state scheme. You should Waterloo plumbing specialize in plumbing works for properties under strata schemes.

Prolific plumbing services Connells point area, also provides emergency plumbing services in Oatley and other areas of Sydney. We are always available be it for inquiry, or repairs or maintenance of your strata plumbing appliances.

We are always available as we offer 24/7 plumbing services.

If you are in Australia and you need a fix on your blocked drain. You should call prolific plumbing services to help you fix them. They are one of the most reliable and efficient plumbing repair service company in Australia today.

One call solves it all!

How hot water systems work

Boiler

How hot water systems work?

The hot water system is a home plumbing system that involves the use of the central boiler, which would help heat up the water to about 60 to 83 degrees Celsius. This hot water will then be circulated through a pipe to coil units known as radiators. These radiators are located in various rooms in the house.

What makes how water flow?

Gravity and pressure are used to drive the hot water through pipes. More commonly, pumps are used to drive the hot water as it is more efficient and easier to control. Pumps are also more flexible.

Hot water systems supply hot water to the rooms, giving out heat via the emitters from the hot heater’s surface through radiation and convection.

After a while, the hot water becomes a little cooler and is returned to the boiler.

This is how most hot water systems in homes work, heating homes, releasing hot water for baths, etc. Hot water system would need installation for it to be available in your home. It would need maintenance and service after some time. It would also need repairing anytime it goes bad and doesn’t work properly.


What do we do?

Prolific Plumbing can help you to install a hot water system and provide maintenance, service and repairs.

If you are not sure which brand to buy, call Prolific plumbing today to get an idea of some of the best gas boiler and pump brands. In addition to installing hot water systems, we also dispose of and recycle old tanks. We also help with heat system maintenance. If there is an issue with your hot water system – our plumber in Arncliffe or in any of these Sydney’s suburbs is your best bet.

So what hot water plumbing services do we provide?

Our hot water system, installation services include:

  • Hot water plumbing installation
  • Hot water plumbing maintenance
  • Emergency hot water plumbing
  • Hot water plumbing replacement
  • Hot more ware plumbing repairs

If you need hot water system plumbing be sure contact Prolific plumbing. We are always here to help you.

One call solves it all!

Who is an emergency plumber?

drains

When it comes to plumbing emergencies, some plumbing issues need really fast attention compared to other types of plumbing issues. Even though no plumbing issues should be left unattended, some plumbing cannot be contained or managed and would need immediate attention. For this, it is advisable to get emergency plumbing services for professionals to help solve the issues. The sooner, the better.

Emergency plumbing is a form of plumbing service that involves the 24/7 availability of plumbing services from your plumbing service provider. Such that anytime you call for plumbing service, you get it as fast as possible.

Some plumbing issues are considered emergency plumbing services. One of these plumbing issues is the overflowing toilet. A lot of plumbing services that offer emergency plumbing make this one of their core emergency plumbing services.

Overflowing toilet emergency

An overflowing toilet occurs when your toilet is either clogged or damaged. No matter what causes it, an overflowing toilet is always a nightmare for its users. You have to deal with the problem immediately, or it would lead to a lot more bugger cases. It can eventually make your home inhabitable if left unattended, causing disease and infection to occupants.

In this case, the first thing you do is call plumbing services rendering companies like Prolific plumbing to come to help you fix. Prolific plumbers are well skilled and well equipped to handle all forms of overflowing toilet issues. Prolific plumbing offers 24 hours emergency plumbing services 24 hours all day, all year round, even during weekends and holidays.

After calling prolific plumbing services, switch off the toilet water supply to prevent the problem from worsening. You should also shut off the water supply valve on the wall behind the toilet. To turn it off, you need to turn the valve counterclockwise.

After calling prolific plumbing services, switch off the toilet water supply to prevent the problem from worsening. You should also shut off the water supply valve on the wall behind the toilet. To turn it off, you need to turn the valve counterclockwise.

In no time, the prolific plumber will get to your house and come help you fix your overflowing toilet issues. Prolific plumbing is based in Sydney, Australia, and provides emergency plumbing service to all residents in Sydney and regions around.

Burst pipe

Another plumbing issue considered an emergency plumbing issue is burst pipes. This problem is very common during winters due to the freezing temperatures. But it doesn’t only happen during winters. It can happen anytime, and anytime it does, you need emergency plumbing help.

You should know that a burst pipe can release gallons of water in minutes, wasting your water supply. It can also cause lasting damage to your home structure.

After calling for the plumber, you should make sure you run off the main water supply so as to prevent further damages. You should also remove any form of furniture and other belongings in the affected room to prevent further damages.

There are a lot of other issues that can be classified as an emergency plumbing problem. Some include sump pump failure, broken water heater, leaky pipes, clogged sewer lines washing machine hose leaks, etc.
Even though we considered some emergency issues, all plumbing issues are considered emergencies in prolific plumbing services.

The thing is, any plumbing issues if left unattended, would cause more havoc to your house. That is why we advise any plumbing issues in your commercial and residential buildings to be handled immediately.

One call solves it all!

Plumber Meriton

Meriton plumber

For those that don’t know Meriton. Meriton is Australia’s largest apartment developer and the county’s biggest residential home builder founded by Harry Triguboff. Prolific plumbing works in Meriton buildings and always happy to attend calls to fix a leaking toilet, renovate bathrooms or provide maintenance plumbing in Meriton. Call us and ask for Emergency plumber Meriton is you requite urgent assistance.

Meriton building can be seen all around Sydney, Gold coast, and Brisbane, Australia. It was estimated in 2010 that Meriton builds about 2,000 buildings per year. Since 1963 when the Meriton was established, it is estimated that they have built more than 65,000 residential apartments on the east coast of Australia, which all offer accommodation in 17 locations.

Meriton has a unique way they design their building and run their plumbing appliances. Occupants in these buildings could get confused whenever they need plumbing repair services. If you need quality plumbing services, you should consider prolific plumbing.

With prolific plumbing, you don’t face delayed response time from your plumber or expensive plumbing fees. With prolific plumbing, you get 24 hours services with the best of plumbing services with their team of licensed professional and skilled plumbers all around Australia.

Prolific plumbing is based in Australia, and they are one of the best plumbing service rendering companies with many good customer reviews. With prolific plumbing, you get:

Meriton plumber

If you are in Australia and you need a fix on your blocked drain. You should call prolific plumbing services to help you fix them. They are one of the most reliable and efficient plumbing repair service company in Australia today.

  • Twenty-four hours of plumbing services all day long, all year round. This means that any day you need a plumbing service anytime, prolific plumbing will always be there to pick your calls and come help you fix the issue.
  • The best plumbing services rates for all our plumbing services. Prolific plumbing focuses on making sure that customers are paying high fees for plumbing services while also making sure they get high value for each dollar they pay.
  • Prolific plumbing service fees are very affordable. They are also not volatile and don’t change all year round.
  • Some of the best plumbers Australia has to offer. Prolific plumbers are well trained and highly skillful. They are also very experienced in delivering top-quality plumbing services to the Meriton building.
    Prolific plumbers offer their plumbing services in the most professional way possible, so be rest assured you are getting the best of services for your money.
  • Punctuality! That’s the rule of the business, in addition to our emergency plumbing services, which are available 24/7 every day. They will arrive at your doorpost before the agreed time.
  • Fully licensed plumbers. You should also know prolific plumbing services are insured, so be sure to get the best services all year round.
  • Friendly staff, prolific staff right from the customer care unit to the professional plumbers. Prolific staff plumbers deliver high-quality services and response to all put customers. All our staff treat customers in a friendly and respectable manner. Our customers come; first. Your feedback is always needed and respected.
  • Transparent services. Prolific plumbing will always let you know of every development when fixing your plumbing issues. There are no extra charges for any of our services.
  • A proven track record. Prolific plumbing has a strong record of having a lot of customers satisfied with our services.

Some of the plumbing services we offer include:

Toilet Repair Meriton building

Prolific plumbing offers all kinds of toilet repairs to Meriton buildings. Toilet plumbing issues include leaking toilet, blocked toilet, etc. Just like every plumbing issue, you should not leave them to continue for a long time. If you do, the issue will cause many adverse effects to your toilets and into your homes.

Toilet plumbing issues would not only create a very unhygienic situation in your homes. It would also waste your water due to leaks, which would increase your water bills. Like the unhealthy living environment, all these effects could cause real health issues for you and your family.

You should bring in qualified professional plumbing service to solve the problem instead of trying DIY solutions, which could create more problems.

Prolific plumbing is always happy to help by giving you the best quality plumbing services for your Meriton building. You will be able to relax and use your toilets and other tools without worry, knowing full well you had the best plumbing service. So, give us a call today, and let’s fix it!

Blocked drain toilet
Gas cooktop

Gas Fitting Meriton building

If you need any kind of gas fittings for your home appliance in any Meriton home. You should call prolific plumbing services. You don’t have to wait for a long time to fix your gas fittings. Prolific plumbing professional plumbers are there 24/7.

Some of our gas fitting services include:

  1. Gas meter installation with pipework and valves
  2. Gas detection system installation
  3. Leak testing
  4. Gas pressure adjustments
  5. The repair and installation of gas flue pipes
  6. Gas bottle installation with pigtails, gas lines, changeover valve regulators, etc.
  7. Repair, maintenance Conversion, and installation of gas appliances, etc.

Besides all these, Prolific plumbing offers a wide range of services that include

  • Blocked dam repairs
  • Toilet repairs
  • Repairing overflowing drains
  • Hot water system installation
  • Burst pipe repairing
  • Toilet installation
  • Emergency plumbing work
  • Sewage services
  • Gas fitting services
  • Leaking pipe detection
  • Leaking pipe fixing
  • Blocked stormwater repairs
  • Kitchen sinks
  • Gutter leaks repairs
  • Bathroom plumbing
  • Unblocking of any drain
  • Gas heater installation
  • Das heater detection
  • Pipe relining
  • Water filter
  • Backflow prevention
  • Roof leaks
  • Drain inspection using CCTV
  • Gas heater repairs
  • Leaking shower repairs, etc.

Are you having any plumbing issues with your Meriton home? Contact prolific plumbing today, and let’s fix it for you. Stay safe!

One call solves it all!

Fix a blocked drain

blocked sink drain

How to fix a blocked drain

There are many plumbing issues faced by residents in their various homes, and one of the most common is the blocked drains. In prolific plumbing, it is one of the top plumbing issues people call for us to fix.

The effects of blocked drains can’t be overemphasized; it leads to stagnant water in the house that won’t drain due to the blocked sinks. A blocked drain will start minor at first, then there will be signs of the slow movement of liquids into the drains, but the more you allow it to continue, the worse it gets.

It will lead to a full blockage that would prevent water from leaving the kitchen sink and the bathroom, and even the toilets. It could turn out a pretty bad situation real fast.

If you suspect you have a blocked drain, the ideal case is to call for professional help. Still, if you have time, there are many DIY processes you can do to solve the issue and that we are going to talk about in this article.

But before going to the DIYs, it’s ideal you know the signs of the blocked drain.

Some of the early signs of blocked drains include:

1. Foul smell: This is the first sign you would definitely notice if you got blocked drains. There will be this unusual smell like a sewage-like scent. Especially when you can’t decipher where it is coming from.

2. Gurgling sounds: You would hear gurgling sounds. When the water drains, it shows the water is pooling and pushing against the pipe due to the blockage.

3. Slow draining: When you drain water away from your sink or shower, you will notice the water takes a lot more time to drain than normal. And this usually gets worse as the problem continues to go unchecked till it doesn’t drain again.

4. Overflowing: This is one of the extreme early signs; there will be liquids spilling back instead of going into the drain.

So what causes this blocked drainage in the first places?

They include:

  1. Toiletries: Baby wipes, nappies, sanitary products, etc. Although they are essential, they can go on to accumulate in the pipe and cause drain blockage.
  2. Tree roots: This could cause a drain blockage where the roots keep growing until it breaches the pipe.
  3. Cooking oil: It is always advisable not to throw cooking oil into the sink due to its viscosity. It doesn’t flow as fast as water and would solidify and clump together with other food debris to build a blockage on the drain.
  4. Food scraps: Same as with the cooking oil, don’t throw food scraps into the drain. They belong in your waste bin. They also could clump together and block your drain.
  5. Foreign objects: This is very common in homes with children. They could flush all kinds of objects down the toilet. These things would probably lodge somewhere in the u-bend and cause blockage to your drains.
  6. Hair: yes, your long pretty hair can cause blocked drainage as some of them would down the sink as you wash them in the shower.
  7. Soaps, mineral buildup, natural debris, and cat litter can also cause blocked drainage.

How to fix a blocked drain

So Here are the DIYs processes we can use to solve our blocked drainage issue:

  1. Boiling water: When the blockage is caused by toiletries or conditioners or grease, even cooking oils; You can make use of their low melting point to break them by pouring enough hot water into the drain.
  2. Using plungers: This is the use of a vacuum effect of the plungers to remove the blockage. Once you place the plunger on the plughole, it would form a seal affecting the vacuum effect to pull the blockage.
  3. Using natural cleaners: This is just like using the boiling ester method. In this case, you are adding natural cleaners to break the blockage apart. A combination of water with natural cleaners like a cup of vinegar, a cup of bicarbonate of soda would do the trick.
    You could also make use of caustic cleaners, which are ideal for tougher blockages. But due to its strong acidic properties, you should ventilate the room before starting.
  4. DIY drain snake: The DIY drain snake tries to function like the plumber drain snake. This is made of a thin metal wire like a cat hanger with a gook at the snake’s end. You insert the head into the plughole to fish out the blockage. This is mostly down for blockage caused by hair.

Drain is still blocked?

Suppose you have exhausted the options, and the drain is still blocked. In that case, you need to rethink your decision not to call a professional plumber.
The DIY will not work if the blockage is extremely severe. Let the professionals come to have a check and use other advanced methods like:

  1. Plumbers drain snakes
  2. CCTV
  3. Hydro jets
  4. Excavation
  5. Pipe relining etc.

If you are in Australia and you need a fix on your blocked drain. You should call prolific plumbing services to help you fix them. They are one of the most reliable and efficient plumbing repair service company in Australia today.

One call solves it all!

How to fix leaking taps

blocked sink

How to fix leaking taps

tap leaking

Leaking taps is one of the most common types of plumbing issues homeowners face regularly. It can easily become a real nuisance very fast, as if it goes unchecked for a while. It could lead to many other plumbing issues and cost you a lot of money regarding water bills.

But the question is, how do I fix leaking taps. The best way to fix leaking taps is by calling proven professional plumbers to help fix them. But there are a lot of other ways you can do it by yourself.

In this article, we will be going deeper into steps you should take to fix your leaking tap yourself. You should know that DIY solutions are not as efficient as when a professional plumber fixes them.

If done properly, it could solve the problem for a short time. But since you are reading this article, I’m sure you have made up your mind to try the DIY methods.

So let’s check out some DIY steps you should take to fix your leaking taps

Before going into the steps for fixing your tap, you should know some of the reasons your taps leak. Three are a few things that can cause tap leaking. Which are:

  1. An incorrect size tap washer
  2. A worn-out jumper valve
  3. A worn-out O-ring
  4. You installed the tap washer in an incorrect way
  5. The valve seating is damaged or corroded
  6. The washer on the tap is broken or worn out.

These are some of the main cause of tap leaking, so how do you fix a leaking tap:

There are series of steps for you to follow to fix your leaking tap, whether in your home or your offices.

There are two major types of leaking taps, and they are: the O-ring caused leakage, and the washer caused leakage.

  1. The ring caused tap leakage: if the O-ring caused the leakage, the water would be leaking from the tap’s body and spindle once you turn it on. Sometimes the water might be coming from the cover plate.
  2. The washer caused leakage: This is the most common cause of tap leakage, and it’s characterized by the dripping of water from the tap even when you turn it off.

Below we are going to analyze some simple steps to fix the washer caused leakage

To start, you would need some supplies:

These supplies include:

  • Jumper valves
  • O-ring
  • Washer of the correct size
  • A set of spanner if there is no spanner you van make use of a shifting wrench
  • A cloth
  • Tweezers
  • Pliers
  • Screwdrivers
  • Some gaffer tapes
  • Silicone or resealing kit (you would need this depending on ye type of tap you have)

How to fix your leaking tap in 12 steps (guideline):

  1. You have to turn off your main water supply to prevent the water from wasting when you are fixing it. It is normally located in the front yard, but most apartments have the main water supply in the bathroom.
  2. The second thing you do is turn on the leaking tap and let all the residual water in the pipe drain out. If you think there is still some residue water after doing this, you can turn on a tap on a lower level to drain the remaining water.
  3. The third step is to plug your sink or basin to prevent any equipment from going down the drain. This step is quite important, and a lot of people do forget to do this.
  4. Now, you need to remove your tap button. In most taps, this is the part of the tap that has hot or cold written on it.
  5. After removing the tap button, you would have to remove the tap handle to see the tap insides. To remove the tap handle, you need to insecure it, and you might need to make use of a wrench or spanner.
  6. The next thing to do is remove the tap shroud or skirt with pliers.
  7. The next step is to remove the tap body by rescuing the tap bonnet using a spanner.
  8. Once you have completed all the taps, the next thing to do is remove your tap jumper valve and washer. You might need a pair of tweezers or some needle nose pliers to get them.
  9. Once you have your tap washer and jumper valve, you should take them to your local hardware store and buy some replacement for any broken part. You could also get some skirt sealer while you are there.
  10. Then, you replace the tap washer and jumper valve with the new one and put them into the tap.
  11. Now, this is the part where you put back everything together. Now take the reverse direction by putting the tap bonnet followed by the others and making sure you tighten them.
  12. Turn on the water supply mains and then test your tap to see any changes.

Once the problem has been solved, then you can use some more of your silicone sealant on the skirt base to seal the tap. If you still have issues after this or you can’t go through this guideline properly, you should call prolific plumbing for help.


Our plumbers are 24/7 available to fix your plumbing issues.

One call solves it all!

CHAT